 Latest & News
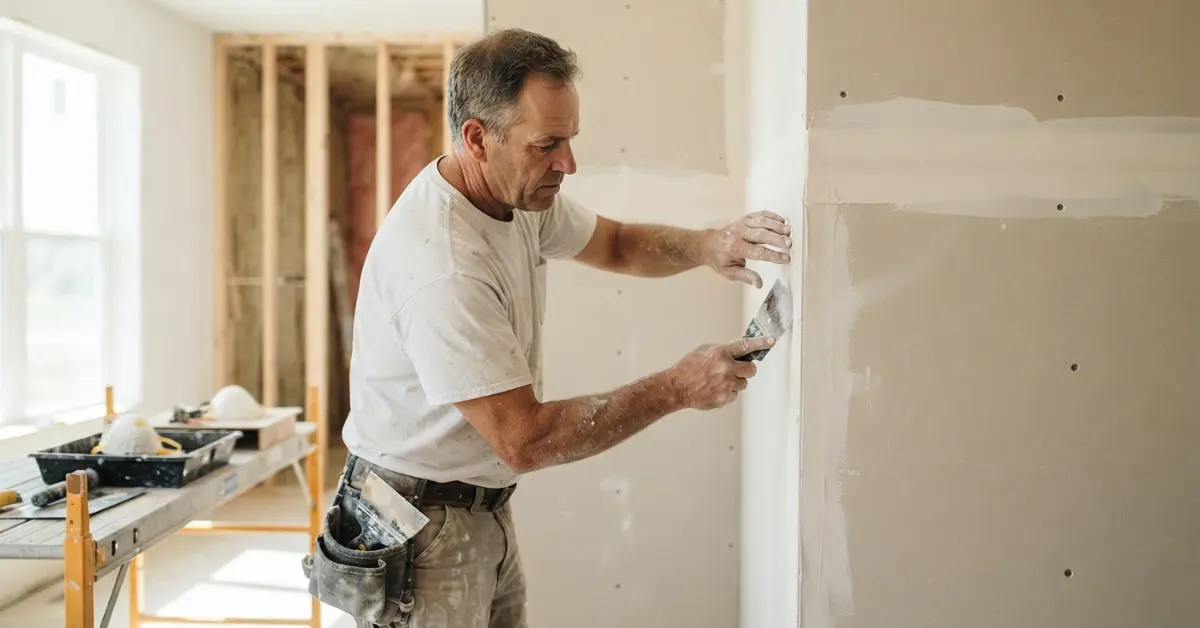
Drywall taping looks simple, but small mistakes can become very noticeable once the wall is painted or textured. Drywall taping mistakes such as poor tape placement, uneven compound, air bubbles, and rushed drying can create visible seams and an uneven finish.
For homeowners and builders in Merrill, Wisconsin, careful preparation is especially important when finishing new construction, basements, additions, or other interior spaces. Knowing what commonly goes wrong makes it easier to expect a clean, professional result.
Why Do Drywall Taping Mistakes Happen So Often?
Most problems begin before the final sanding stage. Dusty surfaces, poorly seated fasteners, incorrect tape application, thick compound, and insufficient drying time can all affect the finished surface. Professional taping depends on consistency at every stage.
AGP Drywall provides professional taping and finishing services designed to create smooth joints and a clean surface ready for the next finishing stage. AGP Drywall taping services
Another important factor is understanding the type of drywall and the area being finished. For example, attached garages may have different fire-rating requirements than ordinary interior walls. Fire tape drywall tips
What Are the Most Common Drywall Taping Mistakes?
Drywall taping mistakes usually involve preparation, tape placement, compound thickness, drying, sanding, or final inspection. The ten most common include:
- Taping over dusty drywall
- Choosing an unsuitable tape or technique
- Leaving air beneath the tape
- Applying too much joint compound
- Applying too little compound
- Skipping proper feathering
- Rushing between coats
- Sanding too aggressively
- Ignoring corners and butt joints
- Failing to inspect under proper lighting
Each mistake can affect how flat, smooth, and consistent the completed wall looks.
1. Taping Over Dust or Debris
Joint compound needs a clean surface to bond properly. Dust, drywall crumbs, and loose debris can interfere with the taping process and contribute to poor adhesion.
Before applying compound, remove dust from seams and make sure the drywall surface is clean and secure. A few minutes of preparation can make the later finishing stages much easier.
2. Using the Wrong Tape Technique
Paper tape and mesh tape have different application requirements. Paper tape is embedded into joint compound, while mesh tape requires the appropriate compound and coverage.
The important point is not simply choosing a tape. The material must be applied using the technique suited to it. Incorrect application can contribute to bubbling, weak joints, or visible seams.
3. Leaving Air Beneath the Tape
One of the most recognizable drywall joint tape problems is bubbling. Air can remain beneath the tape when it is not properly embedded or when compound coverage is inconsistent.
Apply a suitable layer of compound and press the tape into it with controlled pressure. The goal is to remove excess compound and air without squeezing all the compound out from beneath the tape.
4. Applying Too Much Joint Compound
More mud does not automatically create a better finish. Thick applications take longer to dry and can leave ridges, bumps, and excessive sanding work.
Professional finishing is generally built in controlled layers. Thin coats allow the joint to gradually become wider and smoother without creating a heavy buildup in the center.
5. Applying Too Little Compound
The opposite problem can also create trouble. If there is not enough compound beneath or over the tape, the tape may remain visible and the joint can lack a smooth transition.
A properly finished seam should gradually blend into the surrounding drywall. Consistent coverage is more important than trying to complete the joint with one quick pass.
How Can You Prevent Tape Bubbles and Uneven Seams?
Preventing drywall tape bubbles starts with a clean surface, consistent compound coverage, proper embedding pressure, and enough drying time between coats. The tape should sit securely within the compound without trapped air, wrinkles, or dry areas underneath.
6. Skipping Proper Feathering
Feathering spreads the compound gradually away from the center of the joint. Without it, the finished seam can appear raised even when the tape itself is installed correctly.
Use progressively wider applications to blend the joint into the surrounding drywall. This is particularly important on butt joints because they do not have the recessed edges found on long tapered seams.
7. Rushing Between Coats
The joint compound needs adequate time to dry before another coat is applied. Adding another layer too soon can trap moisture and make the surface difficult to finish evenly.
Drying time depends on the compound, thickness, temperature, humidity, and airflow. Follow the product instructions rather than relying on a fixed timetable for every project.
8. Sanding Too Aggressively
Sanding removes surface imperfections, but excessive sanding can create new problems. Going too far can damage the paper face of the drywall or create uneven areas around the joint.
Use controlled sanding and inspect the surface frequently. The goal is to smooth the transition, not remove large amounts of material.
Which Areas Need Extra Attention During Drywall Finishing?
Corners, butt joints, ceiling connections, and areas around openings deserve extra attention because they can expose drywall finishing problems more easily.
9. Neglecting Corners and Butt Joints
Inside corners require careful tape placement and consistent compound coverage. Butt joints also need wider feathering because the joint can otherwise stand out from the surrounding surface.
Take time to check these areas before moving to the final finishing stage. A seam that looks acceptable from a distance may become obvious after primer, paint, or strong side lighting.
10. Skipping the Final Lighting Inspection
Normal room lighting does not always reveal surface imperfections. Light coming across a wall at an angle can highlight ridges, depressions, uneven feathering, and visible tape edges.
A practical final process includes:
- Inspecting seams from different angles.
- Checking corners and transitions.
- Looking for ridges or depressions.
- Reviewing the surface under strong angled light.
- Confirming the wall is ready for the next finishing stage.
This final inspection is one of the simplest ways to catch inconsistencies before the project moves forward.
How Does Professional Taping Create a Better Finished Surface?
A quality drywall taping process is systematic rather than rushed. AGP Drywall describes its process around preparation, tape and compound application, multiple finishing layers, sanding, and attention to detail.
For a typical project, the workflow can include:
- Surface preparation: Check drywall panels, seams, fasteners, and corners.
- First compound application: Create an even base for the tape.
- Tape embedding: Position and embed the tape consistently.
- Additional coats: Build the joint gradually and feather the edges.
- Sanding: Smooth the finished compound without damaging the drywall face.
- Quality inspection: Review seams, corners, and transitions under suitable lighting.
AGP Drywall serves Merrill and surrounding Wisconsin communities, with service information showing weekday and weekend operating hours. Its listed service area includes counties such as Lincoln, Langlade, Marathon, Oneida, Portage, Shawano, Vilas, Waupaca, and Wood.
For local project inquiries, the business lists 1010 E 9th St Merrill, WI 54452 and Call (715) 393-9680 to discuss your drywall taping project and request an estimate.
Get Professional Drywall Taping
What Should a Finished Drywall Surface Look Like?
A properly finished surface should have smooth transitions, consistent seams, clean corners, and no obvious tape edges or heavy compound ridges. The surface should also be appropriate for the selected final finish, whether that means paint or texture.
The best results come from controlling every stage instead of trying to hide imperfections at the end. Good preparation, careful tape embedding, thin compound layers, proper feathering, patient drying, and controlled sanding all work together.
How Can Merrill Homeowners Avoid Taping Problems?
Homeowners in Merrill can reduce finishing problems by discussing the project scope before work begins and making sure the drywall installation is ready for taping. This includes confirming the panels are properly secured, seams are accessible, and the desired final finish is understood.
Whether the project involves a new home, basement, commercial interior, or another construction space, the finishing process should be planned around the condition and layout of the drywall.
The main lesson is simple: drywall taping mistakes are easier to prevent than to deal with after paint or texture has been applied. Careful technique and a consistent finishing process create a cleaner surface from the beginning.
For homeowners and builders looking for professional taping in Merrill, AGP Drywall offers drywall installation, taping, and finishing services for residential and commercial projects.
Frequently Asked Questions
How much does professional drywall taping cost?
The price depends on the amount of drywall, number of rooms, ceiling height, joint layout, required finish, and overall project scope. A professional estimate is the best way to determine the cost for a specific property. AGP Drywall provides estimates based on individual project requirements rather than applying one price to every job.
How long does drywall taping usually take?
Timing varies according to the size and complexity of the project and the drying conditions between compound applications. A small area may move through the process relatively quickly, while a new home or larger commercial project requires more time. Proper drying should not be rushed simply to shorten the schedule.
Does AGP Drywall serve areas around Merrill?
Yes. AGP Drywall is based in Merrill and serves multiple surrounding Wisconsin counties. Its listed service areas include Langlade, Lincoln, Marathon, Oneida, Portage, Shawano, Vilas, Waupaca, and Wood counties. Project availability can depend on location, scope, and scheduling.
What is included in professional drywall taping?
A typical taping process includes surface preparation, application of joint compound, embedding joint tape, additional compound coats, feathering, sanding, and final inspection. The exact scope depends on the project. Professional taping is intended to create smooth, consistent joints that are ready for the next finishing stage.
Can an urgent drywall project be scheduled quickly?
Urgent scheduling depends on the current project schedule, location, and size of the work. It is best to contact the contractor as soon as possible with the project details. This allows the team to understand the scope and determine whether the requested timeframe can be accommodated.
Why choose AGP Drywall for taping?
AGP Drywall focuses on drywall installation, taping, and finishing for residential and commercial projects. Its published process emphasizes clean joints, multiple compound layers, sanding, attention to detail, and professional workmanship. The company is based in Merrill and serves several surrounding Wisconsin counties.
