 Latest & News
Cabin drywall installation in northern Wisconsin is not the same job as hanging drywall in a year-round house in town. Lake cabins sit empty for weeks, swing from freezing to warm in a single weekend and deal with damp lake air most of the year. All of that puts stress on walls and ceilings that a typical home never sees.
If you are finishing a new cabin, converting a three-season space or replacing old paneling, knowing these differences helps you plan the job the right way. This guide covers the board, framing, moisture and finishing choices that keep cabin walls looking clean for years.
Why Cabin Drywall Installation Is Different From a Regular Home
A regular home stays near the same temperature all year. A lake cabin might sit at 40 degrees for two weeks, then jump to 70 degrees when the family arrives on Friday night. Wood framing shrinks and swells with those swings, and drywall that is fastened too tightly or finished too stiffly will show it at the seams and corners.
Moisture is the other big factor. Cabins near the water breathe in humid air all summer, and many have crawl spaces or older foundations that add even more dampness. Good cabin drywall installation plans for both movement and moisture from the start, instead of treating the cabin like a suburban house.
How Seasonal Heating Affects Northwoods Cabin Drywall
Many cabins in the Northwoods are heated only part of the time. When the heat drops and then comes back on, framing lumber dries out and moves slightly, which can open tape joints and crack corners. This is especially common in ceilings, where roof trusses can lift in winter and pull away from interior walls.
Installers can plan for this movement. Floating the inside corners, where the wall meets the ceiling, lets the board flex instead of crack. Using drywall adhesive with fewer screws in the field and following correct fastener spacing also helps the board ride along with the framing. These small steps matter much more in Northwoods cabin drywall than in a home that stays at one temperature.
Choosing the Right Board for Lake Cabin Walls and Ceilings
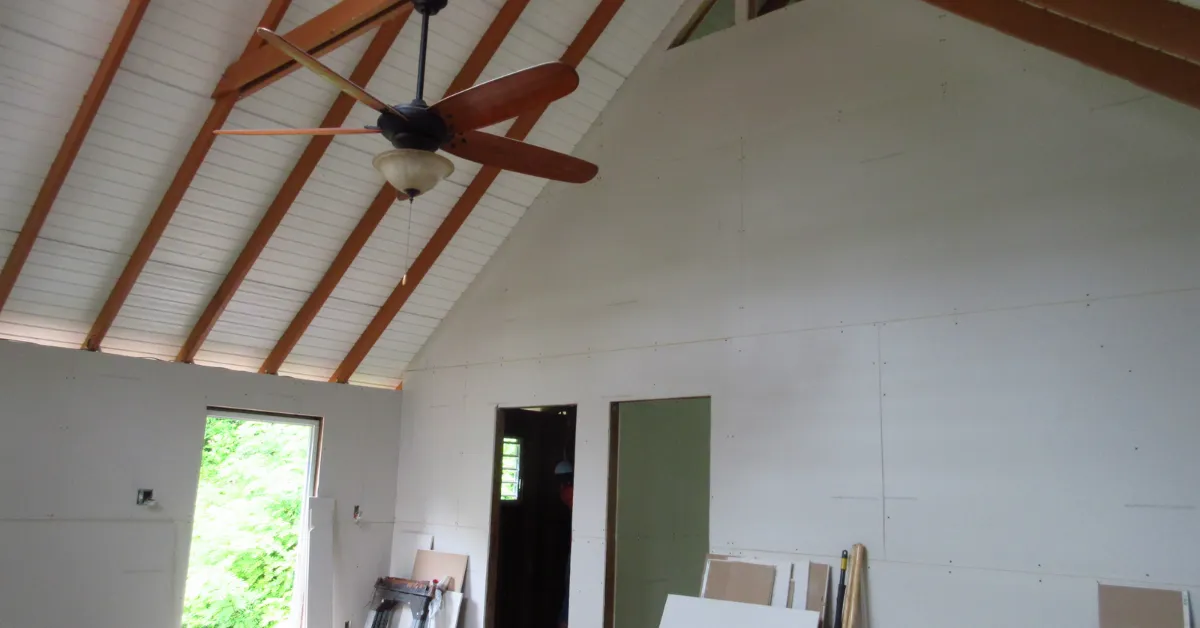
Standard half-inch drywall works for most interior cabin walls. Ceilings are a different story, since many cabins use trusses spaced 24 inches apart. Half-inch board can sag over that span, so five-eighths board or sag-resistant ceiling panels are the better choice for cabin ceiling drywall.
Bathrooms, laundry areas and walls near the lake side of the cabin often call for moisture-resistant drywall. Mold-resistant board is also worth considering in cabins that sit closed up for long stretches, since stale, damp air gives mold a chance to grow. Picking the right board for each room is a core part of cabin drywall installation, and it costs a little more up front and saves a lot of trouble later.
Handling Log Settling and Wood Movement
Log cabins and timber-frame homes add one more challenge. Logs shrink and settle for several years after they are stacked, sometimes by several inches across a full wall height. Drywall that is screwed tight from floor to ceiling against a settling log wall will buckle or crack as the logs move down.
The answer is in the framing, not the drywall. Interior partition walls in log homes are usually built with a settling gap and slip joints at the top, so the walls can stay put while the logs drop. Drywall is then hung on the partition framing only and left free at the top edge, with trim covering the gap. An experienced crew will ask about settling before planning drywall for lake cabins built from logs or heavy timbers.
Vapor Retarders and Moisture Control Behind the Wall
Wisconsin’s cold climate calls for a vapor retarder on the warm side of exterior walls, which is the inside face just behind the drywall. In a cabin, this layer keeps warm, moist indoor air from reaching the cold sheathing and turning into frost or water inside the wall. Gaps around outlets, windows and top plates should be sealed before any board goes up.
Ventilation helps too. Bath fans that vent outside, a dehumidifier in damp months and a slightly cracked window when the cabin is closed up can all keep humidity in check. Drywall lasts much longer when the air around it stays dry, which is why moisture control belongs in every cabin drywall installation plan.
Finishing Choices for Cabin Interiors
Many cabin owners mix drywall with wood accents like knotty pine ceilings, shiplap feature walls or exposed beams. Drywall is still the best choice for most walls because it is easier to paint, simpler to clean and better at blocking sound between bedrooms. A light texture like orange peel or knockdown can hide small movement lines better than a perfectly smooth wall.
For most cabin rooms, a Level 4 finish is plenty. Great rooms with big lake-facing windows are different, since bright side light shows every ridge and seam. In those rooms, a Level 5 skim coat gives a smoother result. AGP Drywall helps cabin owners pick the right finish for each room based on the lighting, paint and how often the space is used.
Installing Drywall in a Cabin During Winter
Drywall can go up in a Northwoods cabin any month of the year, but the space has to stay warm. Joint compound needs steady temperatures of at least 50 degrees to dry and bond properly, and that heat should stay on from hanging through final sanding. Cold, damp air slows drying and can lead to soft joints and cracking.
If the cabin heat is not running yet, a temporary heater can keep the job on track. Many owners like winter cabin drywall installation because the cabin is empty anyway, and the work is done before summer guests arrive. The crew at AGP Drywall plans winter cabin jobs around heat, access and road conditions so the work stays on schedule.
Frequently Asked Questions
Is drywall a good choice for a seasonal lake cabin?
Yes. Drywall is affordable, easy to paint and works well in cabins when it is installed with movement and moisture in mind. The right board, fastening and finish make all the difference.
What thickness of drywall should I use on cabin ceilings?
Use five-eighths board or sag-resistant panels when ceiling trusses or joists are spaced 24 inches apart. Half-inch board is fine for ceilings framed on 16-inch centers.
Can you hang drywall directly on log walls?
It is not recommended. Logs settle over time, so drywall is usually installed on separate framed walls with settling gaps at the top to allow the logs to move freely.
Do I need mold-resistant drywall in my cabin?
It is a smart choice for bathrooms, laundry rooms, lower levels and cabins that stay closed up for long periods. It adds extra protection where damp air tends to linger.
Why do cracks show up at cabin ceiling corners?
Truss movement and seasonal heating cause the ceiling to shift slightly. Floating the corners during installation lets the drywall flex with the framing so the corner stays clean.
Plan Your Cabin Drywall Project
Getting a cabin finished right starts with a crew that understands Northwoods conditions. AGP Drywall provides drywall installation services for lake cabins, seasonal homes and new builds across northern Wisconsin. Call (715) 393-9680 to schedule a free estimate and get your cabin walls done before the next season.
