
 Blog
BlogReplacing ceiling drywall can feel like a daunting task. The thought of lifting large sheets overhead, navigating ladders, and making sure everything lines up perfectly can intimidate even the most experienced DIYers. Yet, with the right approach and a bit of planning, it’s entirely possible to handle this project safely and efficiently. Whether it’s due to old, sagging panels or an upgrade to a smoother surface, mastering the steps to replace ceiling drywall can save time, money, and stress.
Preparing Your Space for Ceiling Drywall Replacement
Before touching any drywall, preparation is key. Start by clearing the room of furniture or covering items with drop cloths. This prevents dust and debris from causing damage or creating extra cleanup work. Removing light fixtures, ceiling fans, or vents is also essential. Even if you plan to work around them, taking these out temporarily ensures a smoother installation.
Safety gear is non-negotiable. Safety goggles protect against falling dust, gloves prevent scrapes, and a dust mask keeps inhalation hazards at bay. For higher ceilings, a sturdy ladder or scaffolding is better than stretching awkwardly on chairs or makeshift supports. Taking the time to set up your workspace properly can make the actual replacement process far less stressful and more accurate.
Choosing the Right Drywall Materials
Not all drywall is created equal. When replacing ceiling drywall, the type of drywall you choose matters. Standard drywall is affordable and widely available, but for ceilings prone to moisture, moisture-resistant drywall or green board can be a better option. Thicker sheets, like 5/8 inch, offer extra durability and reduce sagging in the middle of the ceiling.
Understanding drywall joint compounds, screws, and corner tapes is also crucial. Lightweight drywall screws and proper joint compounds make installation smoother. While it might be tempting to grab the first materials you see, investing a little time into selecting the right sheets and tools can prevent headaches later on. This step ensures your ceiling stays flat, clean, and long-lasting.
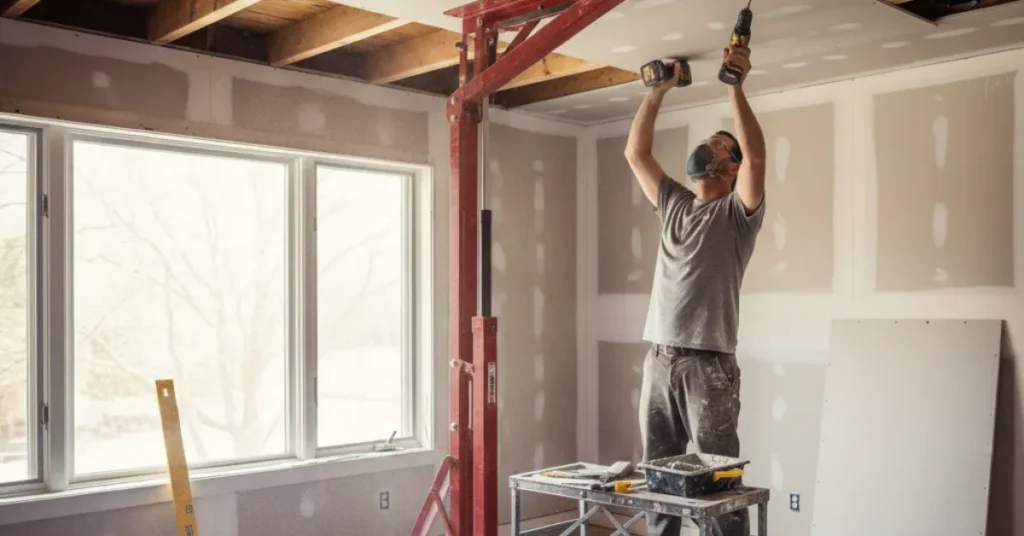
Techniques for Lifting and Securing Ceiling Drywall
Lifting drywall overhead is arguably the trickiest part of the job. One effective method is using a drywall lift. This tool holds the sheet in place while you secure it, reducing strain and improving accuracy. If you don’t have a lift, enlisting a friend for a two-person lift is essential. Attempting this alone often leads to bent sheets or injuries.
When securing the drywall, start by attaching screws along the ceiling joists, spacing them about 12 inches apart. Ensure the sheet is flush with neighboring panels to avoid uneven seams. Small adjustments now prevent major sanding and filling later. Proper alignment at this stage makes finishing much simpler, keeping the ceiling looking professional rather than uneven or bumpy.
Finishing and Smoothing Seams
Once the drywall is in place, the next challenge is blending the seams. Tape and joint compound fill gaps and create a seamless surface. Applying thin, even layers is more effective than thick blobs that take forever to dry. Sanding between coats ensures a smooth finish, preventing visible lines once painted.
A practical tip is to slightly feather the edges of the joint compound. This technique softens transitions and minimizes the need for excessive sanding. Using a pole sander helps reach the ceiling comfortably, keeping your neck from cramping. The goal is a surface so smooth that the ceiling looks like it’s always been there, ready for paint or any other finishing touches.
Tips for Safety and Efficiency
Working on ceilings carries unique risks. Always check that your ladder is stable and positioned on a flat surface. Avoid overreaching while holding heavy drywall sheets. Breaking the project into smaller sections can make it less overwhelming and safer.
Other efficiency tips include pre-cutting sheets to fit the room dimensions, labeling them for orientation, and organizing screws, tape, and compounds nearby. Keeping everything within reach reduces interruptions and keeps momentum going. Simple planning can save hours and prevent frustration halfway through the project.
Maintenance and Longevity of Ceiling Drywall
Even after a flawless installation, ceiling drywall needs care. Regular dusting, avoiding water exposure, and monitoring for signs of sagging or small cracks help keep your ceiling in great shape. Minor touch-ups with joint compound or a fresh coat of paint can extend its lifespan significantly.
For rooms with high humidity, like bathrooms or kitchens, consider dehumidifiers or proper ventilation to prevent moisture-related issues. Maintaining the ceiling properly ensures the time and effort spent replacing ceiling drywall pays off for years.
Frequently Asked Questions
How long does replacing ceiling drywall usually take
For an average room, a two-person team can replace ceiling drywall in one to two days. This includes cutting, lifting, securing, and initial seam finishing. Larger or high-ceiling rooms may require extra time.
Can I replace ceiling drywall by myself
It’s possible for single-person projects if you have a drywall lift. However, having a helper significantly reduces the risk of accidents and makes lifting heavy sheets much easier.
What type of drywall is best for ceilings
Standard 1/2 inch drywall works for most rooms, but 5/8 inch sheets provide extra strength and reduce sagging. Moisture-resistant options are ideal for bathrooms or kitchens.
How do I prevent cracks in ceiling drywall
Proper screw placement along joists, taping seams correctly, and applying multiple thin layers of joint compound help prevent cracking. Allowing each coat to dry fully before sanding is also essential.
Are there special tools for ceiling drywall installation
A drywall lift, pole sander, and quality drywall screws make the process safer and faster. Utility knives, t-squares, and taping knives are also essential for precise cuts and seam finishing.
Conclusion
Replacing ceiling drywall is a challenging yet rewarding project when done with the right tools, techniques, and preparation. From preparing your workspace to choosing the correct materials, lifting sheets safely, and finishing seams smoothly, each step contributes to a professional-looking ceiling. Attention to detail and safety measures ensures the new ceiling is both attractive and long-lasting.
For homeowners looking to tackle this type of project confidently, relying on experience and proper planning is critical. Whether it’s for a standard living area or a moisture-prone space, following these methods ensures excellent results. For expert guidance and high-quality materials, AGP Drywall and Ceiling provides solutions to make replacing ceiling drywall a manageable and satisfying task.
