
 Blog
BlogIf you’ve ever stared at a sagging or stained ceiling, you know how daunting it can feel to tackle it. Learning how to replace drywall ceiling panels may seem overwhelming at first, but with the right approach, it’s a manageable project. Whether you want to replace ceiling drywall in a living room or replace drop ceiling with drywall for a modern, seamless look, understanding the proper steps can save you time, money, and frustration. This guide will walk you through everything you need to know so you can confidently replace drywall ceiling areas without second-guessing yourself.
Why You Might Need to Replace Ceiling Drywall
Replacing ceiling drywall isn’t just about aesthetics. Often, signs like sagging sections, persistent cracks, or water stains indicate it’s time to act. Cosmetic paint issues alone usually don’t require replacement, but structural concerns always do.
Older homes commonly have drop ceilings that feel dated or limit design possibilities. Choosing to replace the drop ceiling with drywall gives you a cleaner surface and opens up options for lighting and ceiling design. From personal experience, swapping a drop ceiling for drywall instantly made a room feel taller and brighter. Knowing why you’re replacing ceiling drywall ensures you plan effectively and avoid unnecessary stress.
Preparing Your Space Before You Replace Ceiling Drywall
Preparation is critical for a smooth project. Start by clearing the room completely, furniture, curtains, and decor should be moved or covered. Dust from ceiling work travels farther than you think, so covering floors and remaining items with plastic sheets is essential.
Switch off power to any ceiling fixtures and remove them carefully. Accurate measurements are key; measure the ceiling area to purchase the right drywall thickness, usually half-inch for most ceilings. Gathering all tools in advance, like a drill, screws, tape, and joint compound, makes the process more efficient. Proper preparation is often the step most overlooked, yet it’s the one that determines whether replacing ceiling drywall goes smoothly or becomes a headache.
Choosing the Right Tools
Having the right tools on hand is half the battle. A drywall lift or an extra pair of strong hands makes holding panels overhead manageable. Use a drill with screwdriver bits for quick installation and keep joint compound and tape ready for finishing seams. Quality tools help maintain control, reduce fatigue, and ensure panels stay level when you replace drywall ceiling sections.
Removing the Existing Ceiling

Start removal slowly and safely. Wear protective eyewear and a mask, and begin at a corner, working in manageable sections. Falling drywall can damage walls or floors, so take your time.
For those replacing drop ceilings, carefully remove the grid system. Inspect the joists once the old panels are gone. They should be straight, level, and secure, any issues here need addressing before you replace ceiling drywall. A stable base prevents sagging or uneven panels later.
Installing New Drywall Panels
This is the core of replacing ceiling drywall. Lift each panel carefully and secure it to the joists with screws spaced evenly. Stagger seams between rows to strengthen the ceiling structure.
Take breaks when needed; holding panels overhead is tiring. Once all panels are in place, check for gaps or uneven edges. Minor adjustments now save hours of sanding later. Patience here directly impacts the overall finish and longevity of the ceiling.
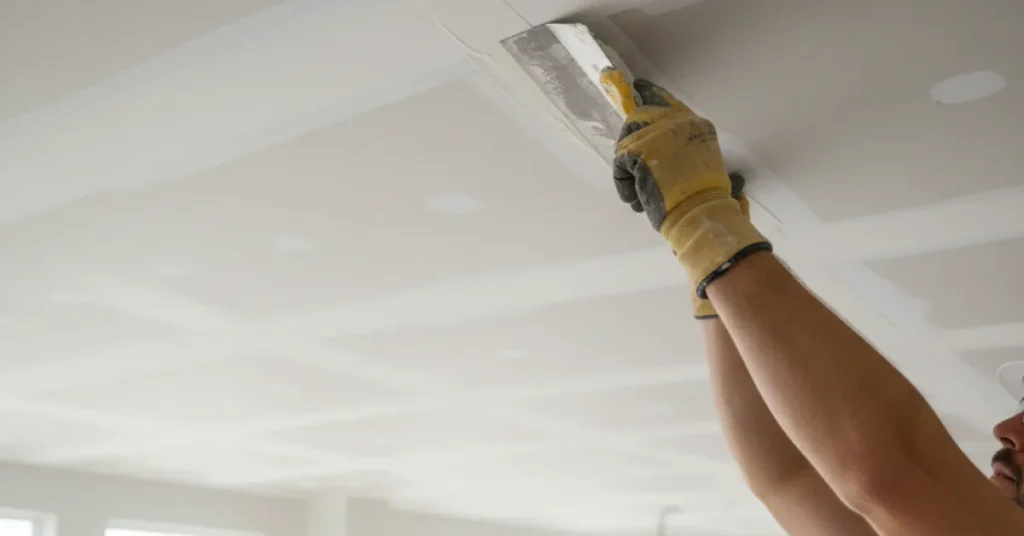
Seams and Joint Treatment
Smooth seams are essential. Apply drywall tape and thin layers of joint compound over seams, letting each layer dry completely before adding the next. Rushing this step is a common mistake, and it’s the difference between a professional-looking ceiling and one that shows every joint.
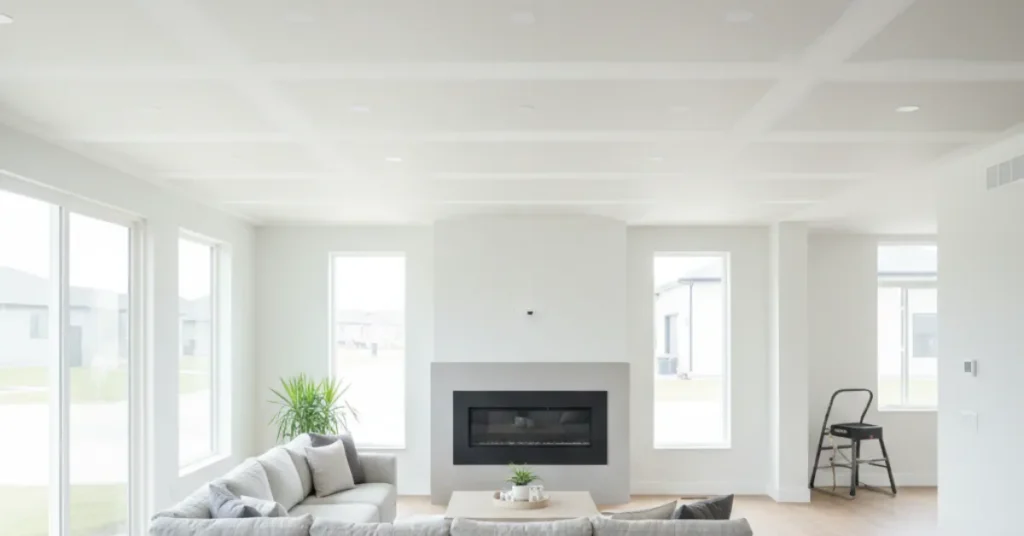
Finishing Touches
Sanding the dried joint compound ensures a smooth surface. Proper lighting helps spot imperfections that the eye might miss. After sanding, priming the ceiling before painting ensures even coverage and highlights any areas that need touch-ups.
Once painted, your ceiling will look polished and modern. Completing the finishing touches properly ensures your efforts last and your ceiling looks as good as new.
Common Mistakes to Avoid
Even small errors can affect the result when you replace ceiling drywall. Avoid using panels that are too thin or spacing screws too far apart. Neglecting proper lighting while sanding leads to uneven finishes. Skipping preparation is another major pitfall. Each step builds on the last, so shortcuts almost always cost more time and frustration in the long run.
Frequently Asked Questions
How long does it take to replace ceiling drywall?
Most rooms take 1–2 days, including removing old panels, installing new ones, and sanding joint compound.
How much does it cost to replace ceiling drywall?
Costs usually start in the mid-hundreds and go up depending on room size and ceiling height.
Is it hard to replace ceiling drywall?
Yes, it’s physically demanding and tricky to get a smooth, level finish without experience.
Should I replace drop ceiling with drywall in older homes?
It can improve the look, but joists and wiring should be checked before installing drywall.
What thickness drywall is best for ceilings?
Half-inch drywall is standard, strong enough to prevent sagging and hold up over time.
Conclusion and Call to Action
Replacing ceiling drywall may feel intimidating, but with the right approach, it’s a completely achievable project. From preparation to finishing touches, every step matters. For homeowners looking for a flawless, modern ceiling without the hassle, AGP Drywall and Ceiling Replacement offers professional solutions that ensure a strong, smooth finish. Take the first step today and transform your ceiling into a clean, polished space.
