 Blog
BlogCorners are where drywall work either looks sharp or falls apart. Flat walls hide small flaws, but corners expose everything. That is why installing drywall corner beads matters so much. When done correctly, the corner bead creates straight, durable edges that protect drywall and give rooms a clean, finished appearance. I still remember my first drywall project where the corners looked uneven until I learned how to install them properly. This guide explains installing drywall corner beads step by step in a clear and practical way, whether you are working on one wall or an entire room.
What Is Plastic Corner Bead and Why It Is Important
A corner bead is a protective strip used to reinforce drywall edges, mainly on outside corners. Plastic options are widely used today because they are lightweight, moisture resistant, and easy to handle. Unlike metal, plastic does not rust, which makes it suitable for kitchens, bathrooms, and basements.
Drywall corner beads help keep corners straight and prevent damage from daily wear. Without it, drywall edges chip easily and lose shape. Corner bead for drywall also provides a solid guide when applying joint compound, making it easier to achieve smooth, professional looking corners. For homeowners and contractors alike, plastic beads offer flexibility and durability without extra effort.
Tools and Materials You Need Before Starting
Preparation makes the process smoother and avoids mistakes. Having everything ready saves time and keeps your focus on accuracy.
You will need
- Plastic drywall corner bead
- Joint compound
- Taping knife
- Measuring tape
- Utility knife
- Level
- Stapler or drywall screws
Before installing corner drywall bead, check that drywall panels meet evenly at the corner. Any gaps or raised edges will show through the finish. Clean edges make the bead sit flat and reduce the amount of compound needed later. This step is simple but makes a noticeable difference in the final look.
Step by Step Guide to Installing Plastic Corner Bead
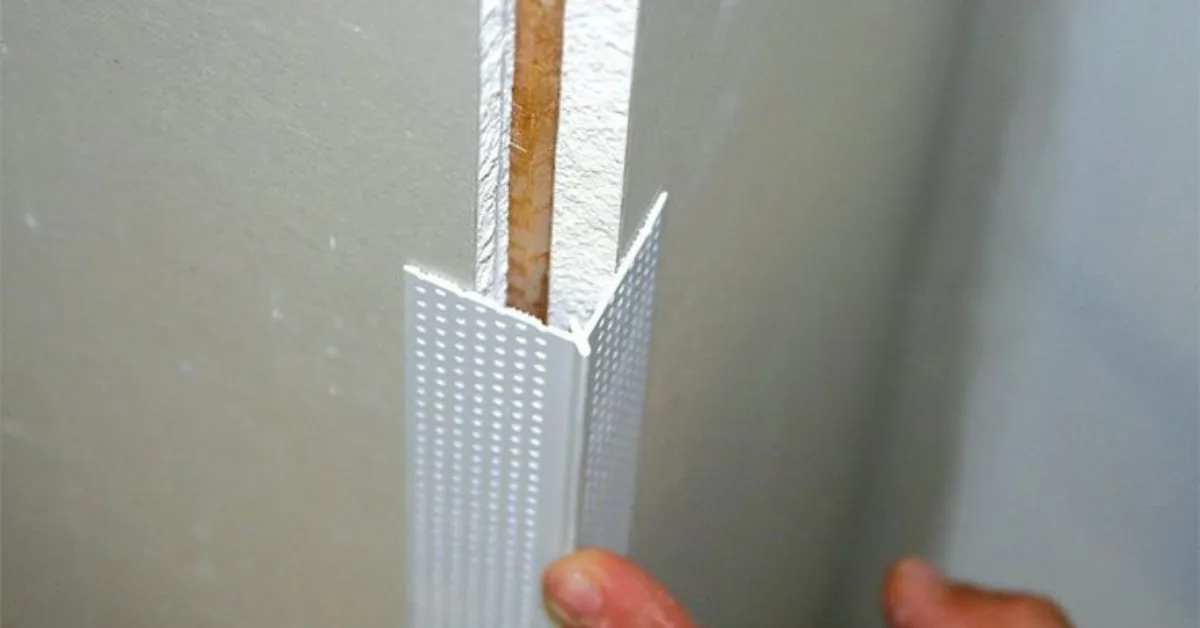
Measuring and Cutting the Bead
Measure the full height of the corner from floor to ceiling. Mark the measurement clearly and cut the bead using a utility knife or snips. Always test fit the piece before fastening it. The drywall corner bead should sit flush without bending or twisting. Accurate cuts help keep the corner straight from top to bottom.
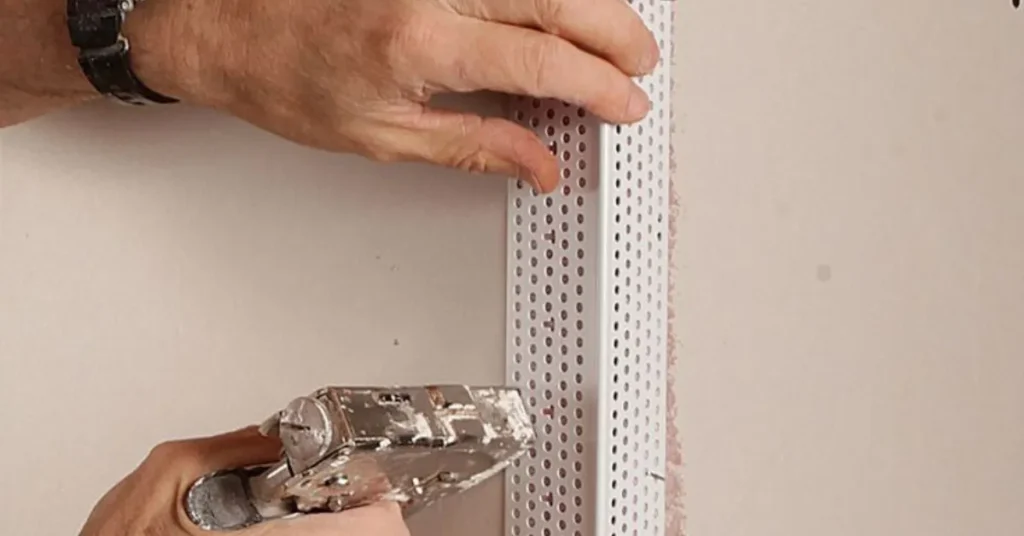
Attaching the Corner Bead Securely
Place the bead on the corner and check alignment with a level. Make sure both sides sit evenly on the drywall surface. Fasten it every eight to ten inches using staples or screws. Avoid over fastening, as this can warp the plastic and cause uneven lines. Straight attachment is the foundation of clean drywalling corners with corner beads.
Applying Joint Compound Properly
Apply a layer of joint compound along both sides of the bead. Use steady pressure and pull the knife from top to bottom in one smooth motion. Do not aim for perfection on the first coat. Let it dry fully, then apply a second coat that extends slightly wider. Light sanding between coats helps achieve a smooth transition from wall to corner bead drywall.
Common Mistakes to Avoid During Installation
One of the most common mistakes is rushing the process. Skipping drying time leads to uneven surfaces. Another issue is applying compound too thick, which makes smoothing harder and increases sanding time.
Misaligned beads also cause problems later. Once compound is applied, correcting a crooked bead becomes difficult. Always double check alignment before fastening. Inside corner bead applications require similar care, even though they are used less frequently. Taking time at each stage results in stronger and cleaner drywall corners that last.
Finishing Touches for a Clean and Professional Look
After the final coat dries, lightly sand the surface until smooth. Run your hand along the edge to feel for bumps or sharp spots. The corner should feel solid and even. Apply primer before painting to seal the compound and create uniform texture.
Plastic corner beads hold up well in busy areas like hallways and staircases. Proper installation ensures the corners stay straight and clean for years. Well finished corners subtly improve how light reflects in a room, making walls look smoother and more polished overall. Many people notice the difference without knowing exactly why, and it almost always comes down to clean edges.
Frequently Asked Questions About Corner Bead Installation
What type of corner bead is best for drywall
Plastic drywall corner bead works well for most projects due to flexibility and moisture resistance.
Can beginners install corner bead for drywall successfully
Yes, with careful measuring and patience, beginners can achieve excellent results.
Is inside corner bead required for standard walls
Most standard inside corners use tape and compound, but inside corner beads are useful for specific designs.
How many coats of compound should be applied
Two to three thin coats provide strength and a smooth finish.
Does plastic corner bead last long
When installed correctly, plastic beads stay strong and maintain straight edges for many years.
Final Thoughts and Call to Action
Learning how to install plastic corner beads on drywall improves both durability and appearance. Clean corners make a noticeable difference in how finished a space feels. Whether you are updating a single room or working on a full interior project, attention to detail matters. For those who want dependable results and expert craftsmanship, AGP Drywall and Finishing Expert delivers precision and quality you can trust.
