 Blog
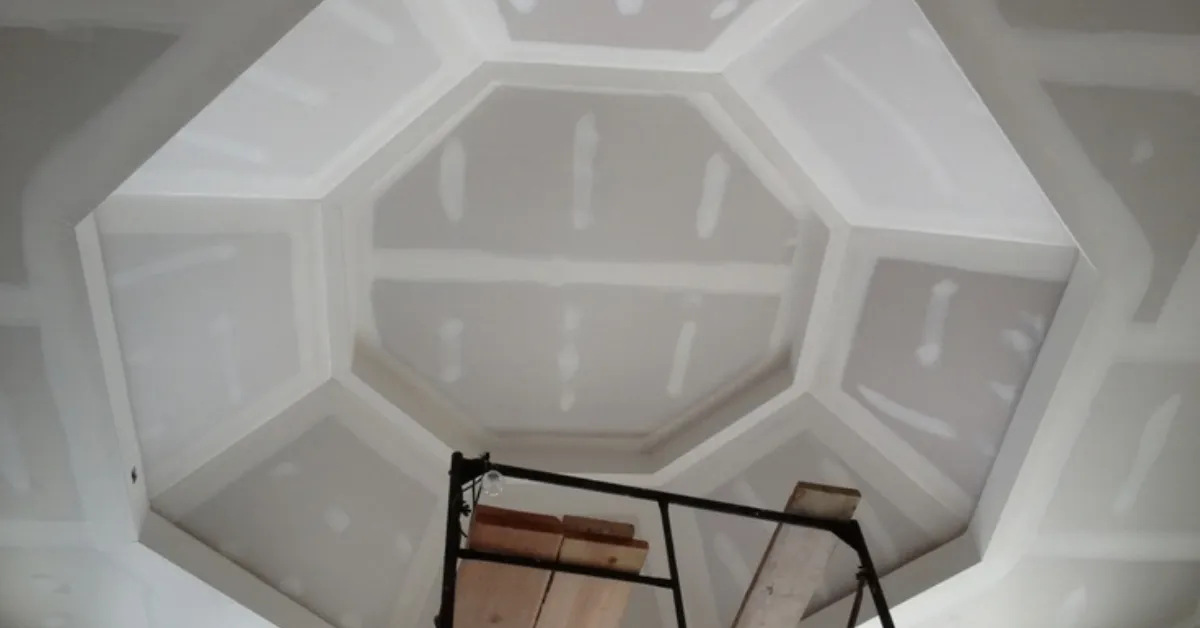
BlogA well finished drywall kitchen ceiling can transform the entire feel of a kitchen. Clean lines, smooth surfaces, and proper installation help create a bright and polished space that feels professionally built. Many homeowners assume ceiling work is too complex, yet with the right tools and preparation it becomes a manageable project.
Kitchens experience heat, moisture, and daily activity, so the ceiling must be strong and stable. Proper installation ensures drywall stays secure and visually appealing for years. Choosing quality drywall ceiling panels for kitchen spaces also improves durability and makes painting easier.
Homeowners who understand the process often save money while gaining a sense of accomplishment. From measuring the joists to finishing the surface, every step plays a role in creating a professional look. With patience and attention to detail, installing a drywall kitchen ceiling can be completed with reliable results and long lasting performance.
Planning The Kitchen Ceiling Installation
Preparation is the difference between frustration and success when installing a drywall kitchen ceiling. Before lifting any panels, spend time evaluating the structure above the kitchen. Ceiling joists must be solid, evenly spaced, and capable of supporting the drywall sheets.
Accurate measurements are essential. Measure the ceiling area carefully so that drywall sheets fit with minimal trimming. Standard drywall sheets are typically four feet wide and eight feet long, though larger sheets can reduce seams in larger kitchens.
Moisture resistant drywall is often recommended for kitchens because it performs better in humid conditions. Many homeowners also choose drywall ceiling panels for kitchen spaces that include mold resistant materials.
Proper planning also includes checking electrical fixtures, lighting positions, and ventilation openings. These areas must be marked before installation begins. A few minutes of planning can prevent unnecessary adjustments later and make the entire drywall kitchen ceiling process smoother.
Tools And Materials You Will Need
Working efficiently requires the right equipment. Installing a drywall kitchen ceiling is far easier when tools are organized and ready before the first panel goes up.
Common materials and tools include drywall sheets, drywall screws, joint compound, tape, and sanding tools. A drywall lift can also help support large panels during installation, especially when working alone.
Key tools often used during installation include:
- Tape measure
• Utility knife
• Drywall saw
• Power drill or screw gun
• T square for drywall
• Sanding block or pole sander
Selecting high quality drywall ceiling panels for kitchen environments is equally important. Panels designed for interior ceilings provide better stability and smoother finishing results.
When materials are prepared ahead of time, homeowners can focus on precision and alignment rather than constantly searching for tools. This preparation makes installing a drywall kitchen ceiling more efficient and less stressful.
Installing Drywall Ceiling Panels For Kitchen Spaces
The installation stage is where planning and preparation come together. Begin by positioning the first drywall sheet perpendicular to the ceiling joists. This orientation provides stronger support and reduces long seams across the ceiling.
Lift the drywall sheet into place and secure it using drywall screws. Screws should be spaced evenly along the joists to hold the panel firmly. Many professionals place screws every eight to twelve inches for a strong hold.
Continue installing drywall ceiling panels for kitchen areas row by row across the ceiling. Stagger the seams between rows so that joints do not line up in a straight line. This technique improves strength and helps create a smoother finished surface.
Carefully cut openings for lights, fans, or vents using a drywall saw or utility knife. Precision at this stage keeps the drywall kitchen ceiling looking neat and balanced once everything is completed.
Although lifting panels overhead can feel challenging at first, the process becomes easier with practice and proper support tools.
Finishing The Ceiling For A Smooth Look
After all drywall sheets are installed, finishing work begins. This stage determines how polished the drywall kitchen ceiling will look once painted.
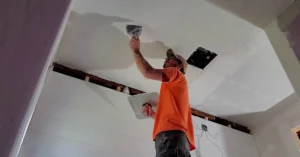
Start by applying drywall tape over each seam between panels. The tape reinforces the joints and helps prevent visible cracks over time. After taping, apply a thin layer of joint compound across the seams and over screw heads.
Allow the compound to dry fully before sanding. Sanding smooths the surface and removes minor ridges or bumps. Many professionals apply two or three light coats of compound to achieve a seamless finish.
Lighting inside kitchens often highlights ceiling imperfections, so patience during finishing is important. When done carefully, drywall ceiling panels for kitchen spaces appear completely smooth once painted.
Once sanding is complete, the surface is ready for primer and paint. A bright ceiling color reflects light and helps the kitchen feel more open and welcoming.
Common Mistakes Homeowners Should Avoid
Even experienced DIY enthusiasts sometimes make errors when installing a drywall kitchen ceiling. Knowing common mistakes can help prevent unnecessary frustration.
One frequent issue is incorrect screw placement. Screws driven too deep can damage drywall paper and weaken the hold. Screws should sit slightly below the surface without tearing the paper.
Another mistake is poor seam alignment. If drywall panels meet unevenly, finishing becomes far more difficult. Always check panel edges carefully before securing them.
Improper spacing between drywall ceiling panels for kitchen areas can also create visible gaps. Panels should fit snugly against each other without forcing them into place.
Finally, rushing the finishing stage often leads to rough surfaces. Joint compound must dry completely between coats. Taking extra time during this step dramatically improves the final appearance of the drywall kitchen ceiling.

Frequently Asked Questions
How thick should drywall be for a kitchen ceiling?
Many homeowners choose half inch drywall for a standard drywall kitchen ceiling. This thickness provides strength while remaining manageable during installation.
Are drywall ceiling panels for kitchen spaces moisture resistant?
Yes, many drywall ceiling panels for kitchen environments are designed with moisture resistant cores. These panels perform better in humid conditions commonly found in kitchens.
Can one person install a drywall kitchen ceiling?
It is possible, though a drywall lift makes the process much easier. Large drywall ceiling panels for kitchen ceilings are heavy and difficult to hold overhead without support.
How long does ceiling drywall installation take?
For an average kitchen, installing the drywall kitchen ceiling often takes one day, while finishing and sanding may take several additional days because compound layers must dry.
What type of paint works best on drywall kitchen ceilings?
Most professionals recommend a quality ceiling paint with a low sheen. This helps hide minor surface variations on drywall ceiling panels for kitchen areas.
Conclusion
A well installed drywall kitchen ceiling adds structure, brightness, and visual appeal to one of the most important rooms in the home. Careful planning, proper tools, and attention to detail all contribute to a smooth and professional result. From measuring joists to finishing seams, each stage plays a role in achieving a clean and durable ceiling surface.
Homeowners willing to invest time in preparation and precision often find the process rewarding and surprisingly manageable. When done correctly, drywall ceiling panels for kitchen spaces provide long lasting performance and a polished appearance that enhances the entire room.
For homeowners who prefer professional craftsmanship or expert guidance, experienced specialists such as AGP Drywall can ensure the drywall kitchen ceiling installation meets the highest standards while delivering a clean and impressive final result.
