
 Blog
BlogInstalling 4×8 drywall can seem challenging at first, but with clear steps and a steady approach, the process becomes much more manageable. Many beginners are surprised by the weight of a 4×8 sheet of drywall, which can make handling the panels a bit tricky at first. Once the material’s weight and balance are understood, these sheets become easier to maneuver, allowing for smooth, clean walls that look professionally finished.
Preparing Your Space for a Perfect Fit
Before you start lifting panels, preparation matters. A small amount of planning saves you from struggling later. Begin by checking measurements around the room. You want your 4×8 drywall sheet to line up comfortably with studs. If the framework is spaced correctly, the panels will sit naturally without forcing anything into position.
Checking Stud Layout
Studs should be spaced consistently. If any area looks uneven, your drywall will not sit flat. Place your tape measure from one end to another and lightly mark stud positions with a pencil. These guide marks help you keep each panel aligned while fastening.
Clearing the Work Area
I learned early on that clutter leads to crooked panels. Move tools, cords and scrap material out of your walking path. A clean floor lets you position your sheets confidently without tripping or tilting.
Understanding Drywall Weight and Handling
People often wonder about the 4×8 drywall weight, especially when lifting overhead. The weight of a 4×8 sheet of drywall usually ranges around fifty to sixty pounds depending on thickness. That might not sound like much when you picture a gym session, but the size and surface area make it tricky to balance.
Lifting Panels Safely
Use your legs, not your back, as you lift. If you work with a partner, agree on a countdown before lifting so both of you move at the same moment. I once tried lifting alone and ended up resting the panel on my foot which taught me to always think ahead.
Storing Sheets Before Use
Place sheets flat on the floor or lean them gently against a wall. Keep them dry so they do not warp. Warped drywall never sits cleanly and will create gaps you want to avoid.
Cutting Drywall for a Clean Fit
A neat cut goes a long way toward seamless installation. When a panel fits tightly, the surface looks naturally smooth. This is where patience becomes your best tool.
Scoring Your Cuts
Use a sharp utility knife and a straight guide. Score once with light pressure, then again a little deeper. When you snap the sheet along the scored line, support both sides so it does not tear unexpectedly. Keeping the cut edges crisp helps you get tight joints.
Cutting Openings for Outlets
Mark your openings carefully. I like to hold the sheet up loosely to the wall first and place gentle marks where the outlets sit. Then I lay the sheet down and use a drywall saw to cut the opening. This prevents guesswork that could leave gaps around outlets.
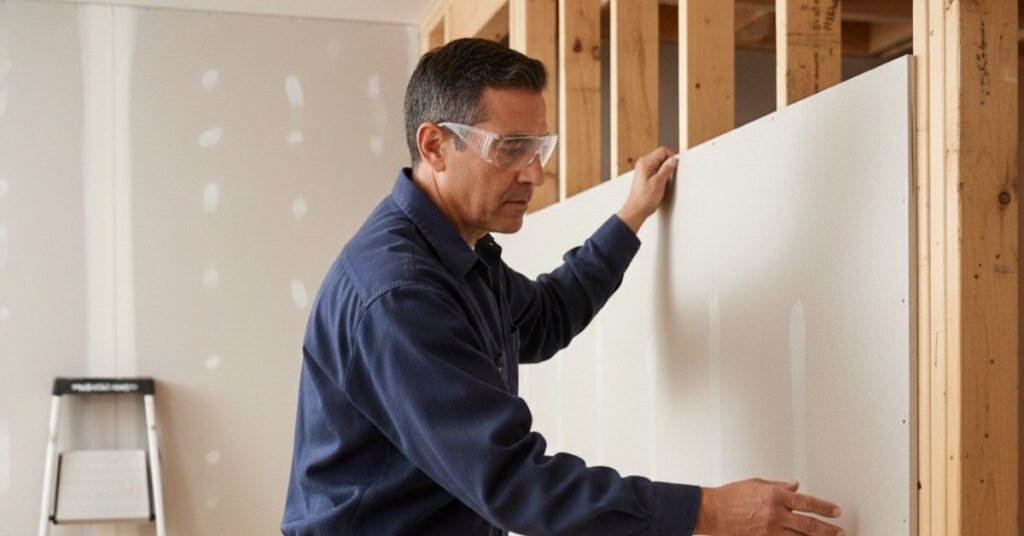
Installing Panels Without Gaps
Now the fun part begins. Once your sheets are ready, you can start placing them along the framework.
Positioning the First Panel
Start at a corner. Lift your first 4×8 drywall sheet and set it snug against the ceiling. If the ceiling is slightly uneven, you can use small shims beneath the sheet to hold it steady. Once it sits level, add screws along the studs starting from the top and working downward.
Keeping Seams Tight
Leave only a tiny gap between panels. You want space small enough that it almost disappears but just enough so the material has room to expand slightly. This prevents crack lines later. Use a straight edge to double check alignment as you move from sheet to sheet.
Finishing Seams for a Smooth Surface
Even with the tightest fit, seams will show until you finish them. The finishing stage helps your wall look seamless.
Applying Joint Compound
Use a wide taping knife to spread compound along joints. Keep each layer smooth and thin. You will apply several coats, letting each one dry fully before adding the next. A steady hand makes a visible difference.
Sanding Between Coats
Light sanding helps every new coat blend into the previous one. I always step back and look at the wall from different angles because lighting changes the appearance. If I see a shadow, I know I need one more coat or another quick sanding pass.
Tips for a Professional Result
A few small habits make your final surface look polished.
Helpful Pointers
• Keep tools clean so dried compound does not scratch your wall
• Check your screws and ensure none sit too deep into the paper surface
• Use consistent pressure when spreading compound
• Keep a vacuum nearby to manage dust and keep everything visible
Frequently Asked Questions
What is the average 4×8 drywall weight
The average sheet tends to weigh around fifty to sixty pounds which can vary based on thickness.
Is the weight of a 4×8 sheet of drywall difficult to manage alone
It can be challenging because of the large size so using a partner or a drywall lift is often helpful.
Where can I find 4×8 drywall Lowes mentioned in guides
Most home improvement stores carry these sheets and Lowes is one common place people check.
How do I choose the right 4×8 drywall sheet for my project
Look at thickness, room type and moisture levels so you pick the right panel for each area.
Do larger rooms require special drywall beyond standard 4×8 panels
You can still use standard sized sheets but you may use more of them depending on wall height and layout.
Conclusion
Learning how to install 4×8 drywall with a clean and seamless finish takes patience, but anyone can manage it with the right preparation and steady technique. Once the basics of weight, handling, cutting and finishing are understood, the entire process becomes smoother and the final results look far more refined. If you prefer expert hands to handle the work for you, you can confidently connect with AGP Drywall Quality Services at (715) 393-9680 for dependable, professional service on your next project.
