 Blog
BlogReplacing a damaged section of drywall might sound intimidating, but with the right approach, it can be a manageable home project. Whether you are dealing with a dent, a hole, or water damage, swapping out a drywall panel section is often the most efficient way to restore your wall. With a few tools, some patience, and a clear process, even a beginner can achieve a seamless result that looks professional.
Preparing the Area for a Drywall Panel Section
Before touching the wall, it is essential to prepare the surrounding area. Start by clearing furniture and covering floors with a drop cloth to catch dust and debris. Remove any baseboards or trim that might get in the way. For safety, wear gloves and eye protection when handling drywall, as the edges can be sharp. Identifying the precise boundaries of the damaged drywall section ensures you cut only what is necessary, keeping the rest of the wall intact.
Another key step is turning off any electricity in the affected area if there are outlets or switches nearby. This precaution prevents accidents and allows you to work confidently. Once the area is ready, mark the perimeter of the section you intend to replace with a pencil and a straightedge. This simple preparation will save time and prevent mistakes as you move into the cutting and fitting stage.
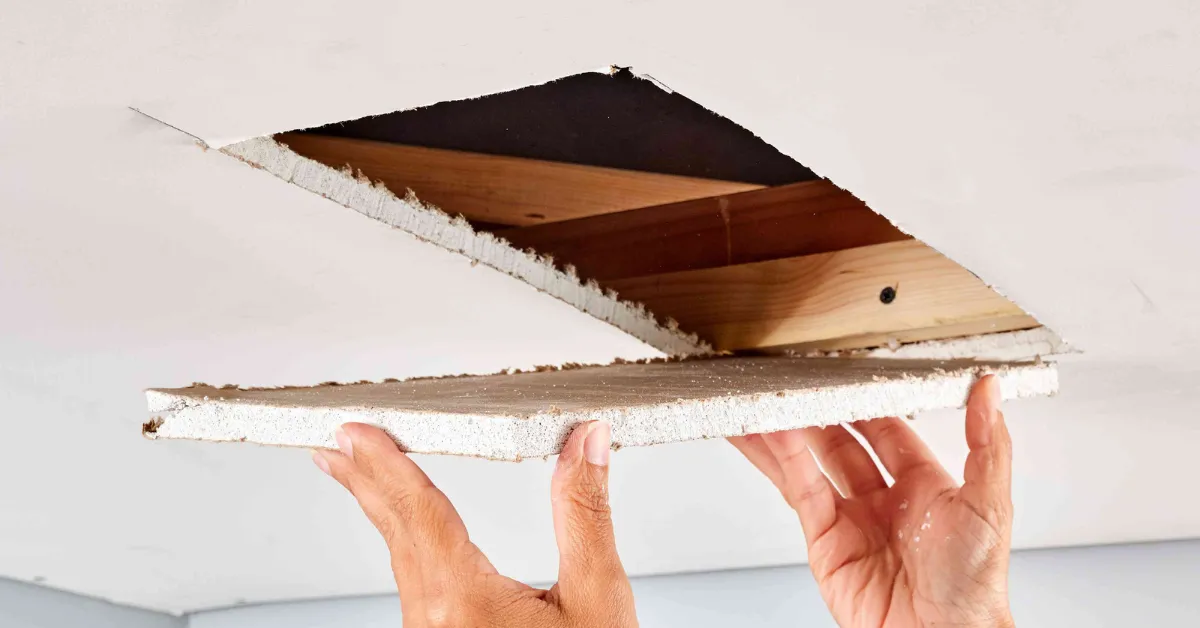
Cutting and Removing the Damaged Drywall Section
The first step in removing a damaged section of drywall is scoring along your marked lines with a utility knife. Cut slowly and carefully to avoid damaging the underlying wall studs. If the section is large, consider cutting it into smaller, manageable pieces. Use a pry bar or drywall saw to gently remove the panel section. Be mindful of electrical wires or plumbing that may be hidden behind the wall.
Once the damaged drywall is out, inspect the studs and surrounding area. Ensure there is no lingering moisture, mold, or structural damage. This is also the perfect opportunity to adjust the framing if necessary, which will make fitting the new drywall panel section easier. Proper preparation at this stage makes a huge difference in achieving a clean finish later.
Measuring and Cutting a New Drywall Panel Section
Accurate measurement is crucial when preparing a replacement drywall panel section. Measure the height and width of the opening precisely, then transfer those dimensions to a new drywall sheet. Adding a small margin for sanding and fitting can prevent tight edges that are difficult to align. Use a straightedge to guide your utility knife as you cut the panel, keeping edges as smooth and even as possible.
Drywall sheets are easy to handle, but large panels can be unwieldy. Enlisting a helper can make lifting and positioning safer and faster. After cutting, dry-fit the panel section in the opening to ensure it sits flush with the surrounding wall. Adjustments at this stage are far easier than once the panel is secured. This careful approach ensures a neat finish without gaps or uneven surfaces.
Securing the New Drywall Section
Once the new drywall panel section fits perfectly, it is time to secure it. Position the panel in place and attach it to the wall studs using drywall screws or nails. Screws are generally preferred as they hold firmly and reduce the risk of popping over time. Drive the screws slightly below the surface so they can later be covered with joint compound or finishing materials.
Align the panel carefully with the existing wall surface to maintain a uniform look. Check all corners and edges to ensure the section is level. Adding extra support behind the seams, such as small strips of wood, can strengthen the connection and reduce the risk of future movement. Proper installation at this stage lays the groundwork for a smooth and professional-looking wall.
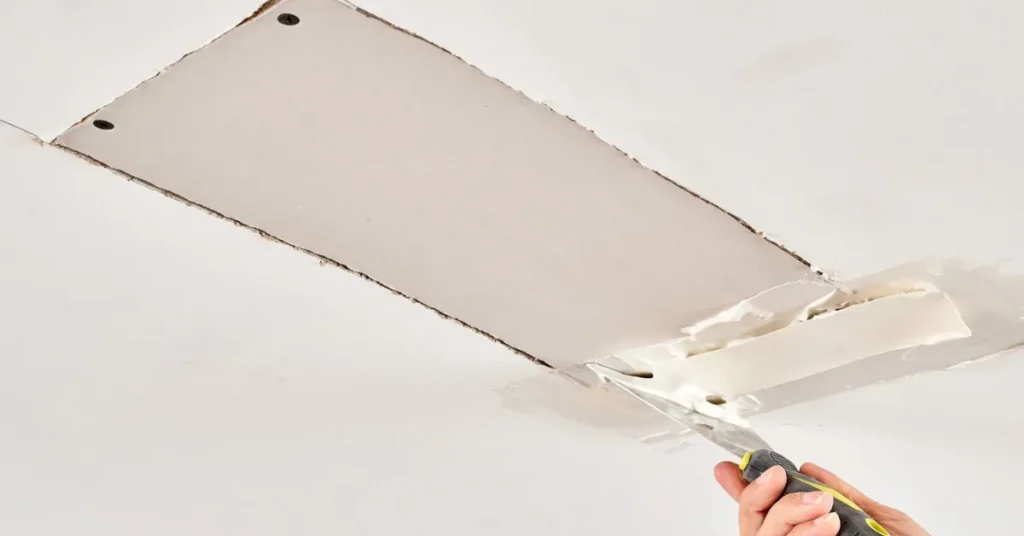
Finishing the Wall Seamlessly
After the panel section is secured, the next step is blending the new drywall with the existing wall. This involves filling the screw holes and seams with joint compound and smoothing them evenly. Lightly sanding between coats ensures the surface is flush and free of bumps. This step may require multiple passes to achieve a flawless finish. Using a corner trowel or finishing knife helps make the edges crisp and professional.
Painting the new section to match the surrounding wall completes the transformation. Priming the drywall first ensures even color and prevents blotchy finishes. With careful attention to detail, the repaired area will be nearly invisible, and the wall will regain its original appearance. Taking your time during finishing pays off in the overall presentation and longevity of the drywall panel section.
Maintaining Your Walls After Replacement
Even after replacing a drywall panel section, ongoing care ensures your walls stay in good shape. Avoid hitting the repaired area with furniture or sharp objects. Keep an eye out for water leaks, which are a common cause of damage. Routine dusting and gentle cleaning help maintain the wall surface. Following these simple maintenance tips can extend the life of your drywall and prevent repeated interventions.
- Inspect the wall every few months for early signs of wear or moisture
- Avoid hanging excessively heavy items without proper support
- Keep ventilation consistent to reduce humidity build-up in the home
Frequently Asked Questions
What tools are essential for replacing a section of drywall?
You will need a utility knife, drywall saw, straightedge, pry bar, measuring tape, drywall screws, screw gun, joint compound, and sanding tools. Gloves and eye protection are recommended for safety.
How do I ensure the new drywall panel section fits correctly?
Measure the opening carefully, cut the panel slightly larger if needed, and dry-fit before securing. Small adjustments are easier at this stage than after attachment.
Can I handle large drywall panel sections alone?
While possible, large panels are heavy and awkward. Enlisting a helper reduces the risk of damage and injury and makes positioning much easier.
What is the best way to blend the new section with the existing wall?
Apply joint compound to seams and screw holes, sand between coats, and prime before painting. Multiple thin layers produce a smoother and more professional finish.
How long does it take for a replaced drywall section to be ready for painting?
Drying time for joint compound can vary, typically 12 to 24 hours per coat. Sanding and applying primer may take additional time. Overall, expect at least two days for the wall to be paint-ready.
Conclusion
Replacing a section of drywall is a practical solution for restoring walls to their original condition. From preparing the area to cutting and securing the panel, each step is crucial for a professional-looking outcome. With patience, attention to detail, and proper finishing techniques, the new drywall panel section will blend seamlessly with the rest of your wall. For those who want expert results without the guesswork, AGP Drywall Replacement Expert provides precise and reliable service to get your walls looking pristine. Take action now to ensure your walls remain strong, clean, and visually appealing.
