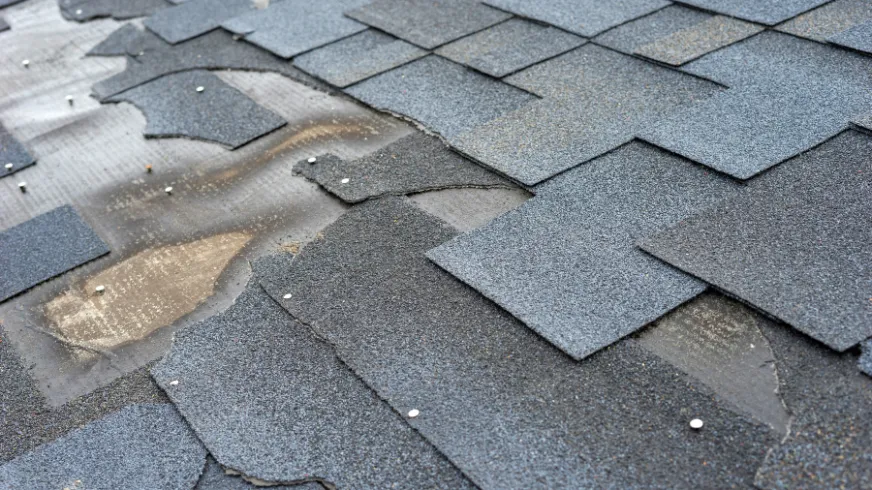
If you’re a homeowner in Wisconsin considering a new roof, learning how to install shingle roofs in Wisconsin can save time and money—especially in areas like Madison, Milwaukee, Green Bay, or Stevens Point. Asphalt shingles remain one of the most popular roofing options across the Badger State thanks to their affordability, durability, and ease of installation. In this step-by-step guide, we’ll walk you through the full process of installing a shingle roof, with tips tailored for Wisconsin’s unique climate and building codes.
Whether you’re in Wausau, Oshkosh, or Appleton, following the correct process is essential for a weather-resistant, long-lasting roof.
Why Choose Asphalt Shingles for Your Wisconsin Home?
Asphalt shingles are ideal for Wisconsin roofing because they:
- Handle snow, ice, and freeze-thaw cycles well
- Provide cost-effective protection
- Are available in various colors and styles
- Offer a lifespan of 20–30 years with proper installation
Wisconsin weather is unpredictable—from heavy snowfall in winter to hot, humid summers—making asphalt shingles a reliable and flexible roofing solution for both rural and urban areas like Racine or Eau Claire.

Step 1: Prepare Your Roof Deck
Before beginning any installation, inspect the roof deck (also called the sheathing). The deck must be:
- Structurally sound
- Dry and clean
- Free of rotting wood or mold
Tip: Wisconsin building code (SPS 321.28) requires roof decks to support snow loads specific to your county. Homeowners in Northern Wisconsin (e.g., Superior or Rhinelander) should take extra care due to higher snow accumulation.
Step 2: Install Ice and Water Shield
In Wisconsin, installing an ice and water shield is not optional—it’s required by code in most areas.
Apply the shield:
- Along the eaves (usually 24″ inside the exterior wall)
- Around valleys and roof penetrations (chimneys, skylights, vents)
This waterproof membrane protects against ice dams and wind-driven rain—common issues in Wisconsin winters.
Step 3: Lay Down Roofing Felt (Underlayment)
Next, install roofing felt (typically 15 lb or 30 lb) or synthetic underlayment across the rest of the roof. This secondary barrier helps:
- Protect against wind-blown rain
- Prevent leaks from shingle damage
Secure the felt using cap nails or staples, overlapping each course by at least 2 inches.
Local Tip: In places like Sheboygan or Fond du Lac where lake-effect moisture is higher, opt for synthetic underlayment for added moisture resistance.
Step 4: Install Asphalt Shingles (Main Field)
Now comes the main part of the job—laying the shingles. Begin at the bottom of the roof and work your way upward in overlapping rows.
Steps:
- Align the first row using a chalk line.
- Nail each shingle using four nails (six in high-wind zones).
- Stagger the vertical seams to prevent water infiltration.
- Continue rows until you reach the ridge.
Pro Tip: In Wisconsin, use architectural (dimensional) shingles over 3-tab shingles for better wind resistance and longevity—especially in areas like Brookfield or West Bend where wind gusts are stronger.
Step 5: Flashing and Ventilation
Proper flashing and ventilation ensure the longevity of your new roof:
- Ventilation is essential in Wisconsin’s varied climate. Ridge vents, soffit vents, or gable vents allow your attic to breathe—preventing mold, moisture damage, and ice damming.
For colder Wisconsin counties like Marathon or Vilas, ventilation helps prevent the formation of dangerous ice dams that can back water into your attic.
Step 6: Install Ridge Cap Shingles
Finish the job by installing ridge cap shingles along the roof peak. These specialized shingles are thicker and shaped to fit ridges and hips.
Use roofing nails and adhesive for extra hold, especially for properties in rural Wisconsin towns where open fields allow for stronger wind exposure.
Step 7: Clean Up and Final Inspection
Once installation is complete:
- Sweep the roof for leftover nails or debris
- Use a magnetic roller to collect loose nails around the property
- Inspect for any missed nails, open seams, or poorly aligned shingles
Finally, check your local building codes in Wisconsin to ensure everything is compliant before scheduling a final inspection (if required).
DIY or Hire a Professional?
While this guide offers a DIY-friendly overview, most homeowners in Wisconsin cities like waupaca or sermedford choose to hire a licensed roofing contractor. Hiring a professional ensures:
- Proper permit handling
- Insurance compliance
- Warranty-backed installation
- Adherence to local snow load and ice dam protection codes
Final Thoughts: Shingle Roof Installation in Wisconsin
Installing a shingle roof in Wisconsin isn’t just about layering materials—it’s about adapting the process to our local climate, wind patterns, and snowfall levels. Whether you’re replacing a roof in Madison, or building new in Janesville, following this step-by-step guide to install shingle roofs in Wisconsin ensures a long-lasting, efficient, and code-compliant result.


 Blog
Blog