 Blog
BlogFinishing your basement is one of the best ways to increase your home’s usable square footage and overall value. Whether you want a cozy family room, a home gym, a guest suite, or an entertainment area, basement finishing can transform a cold, empty space into a functional and comfortable extension of your living area.
Why Finish Your Basement?
Basement finishing provides numerous benefits. It increases the livable space in your home without the need for an addition, making it cost-effective. A finished basement can boost your property value significantly, attract potential buyers, and improve your family’s comfort with dedicated areas for specific needs such as a playroom, office, or media room. Additionally, finishing your basement allows for better insulation control, enhancing your home’s energy efficiency.
Planning and Design
The first step in basement finishing is planning. Determine how you want to use the space. Common uses include a family room, home office, guest bedroom, gym, or entertainment bar area. Create a detailed floor plan, outlining walls, doors, and locations for electrical outlets and plumbing fixtures. This is also the stage to check local building codes and obtain the necessary permits to ensure your project meets all requirements.
Inspecting for Waterproofing
Before starting construction, inspect your basement for any signs of leaks, or water damage. Apply waterproofing sealants to concrete walls and floors if needed. Ensure your gutters and exterior drainage systems direct water away from your home’s foundation to prevent future issues.
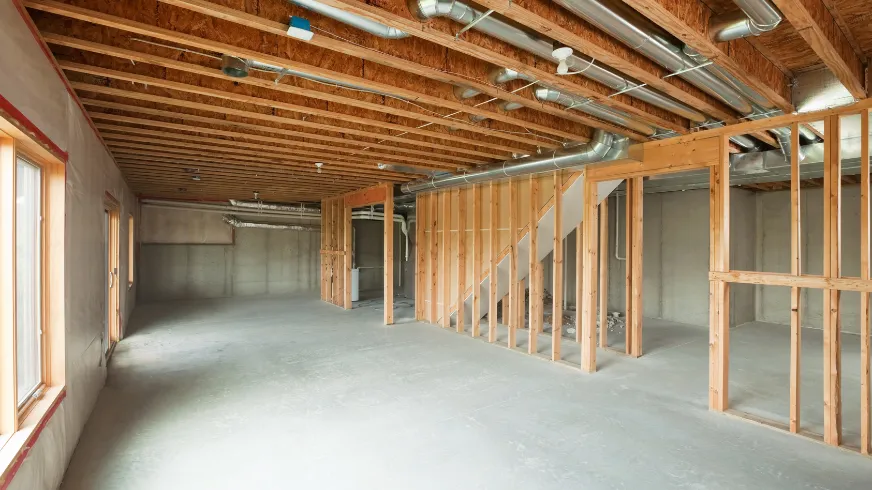
Framing the Basement
Once planning and waterproofing are complete, framing begins. Use treated lumber for any parts of the framing that will be in contact with concrete to prevent rot. Frame the walls according to your layout, including room divisions, closets, and soffits to conceal ducts or plumbing. It is important to ensure that all framing is plumb, level, and securely anchored to create a solid structure for drywall installation.
Electrical and Plumbing Installation
With framing in place, install all necessary electrical wiring for outlets, lighting, and appliances. If you plan to add a bathroom, wet bar, or laundry area, plumbing lines must be installed at this stage. Make sure all work is inspected and approved according to code before closing up the walls.
Insulating the Basement
Insulating your basement walls improves energy efficiency and helps maintain a comfortable temperature year-round. Use foam board or batt insulation with a vapor barrier to prevent from seeping into the finished space and to keep it warm during colder months.
Drywall Installation
After insulation, drywall installation begins. Hang drywall sheets on the framed walls and ceilings, then tape, mud, and sand all seams and corners to achieve a smooth surface. Priming the drywall is essential before painting to seal the surface and ensure even paint absorption.
Flooring Installation
Choose a flooring type that is suitable for basement environments. Vinyl plank flooring, tile, or carpet with resistant padding are popular options that withstand basement humidity. Ensure the concrete subfloor is clean, level, and dry before flooring installation to achieve a professional finish.
Trim and Final Finishes
The last stage includes installing baseboards, door casings, and any built-in shelving or cabinetry. Paint the walls and trim with resistant paints for durability. Finally, install lighting fixtures and décor to personalize the space according to your design theme.
Final Thoughts
Basement finishing is a smart investment that turns an underused area into a beautiful, functional part of your home. By following each step carefully—from planning and inspection to framing, drywall, and flooring installation—you can create a finished basement that meets your needs and adds lasting value to your property.
